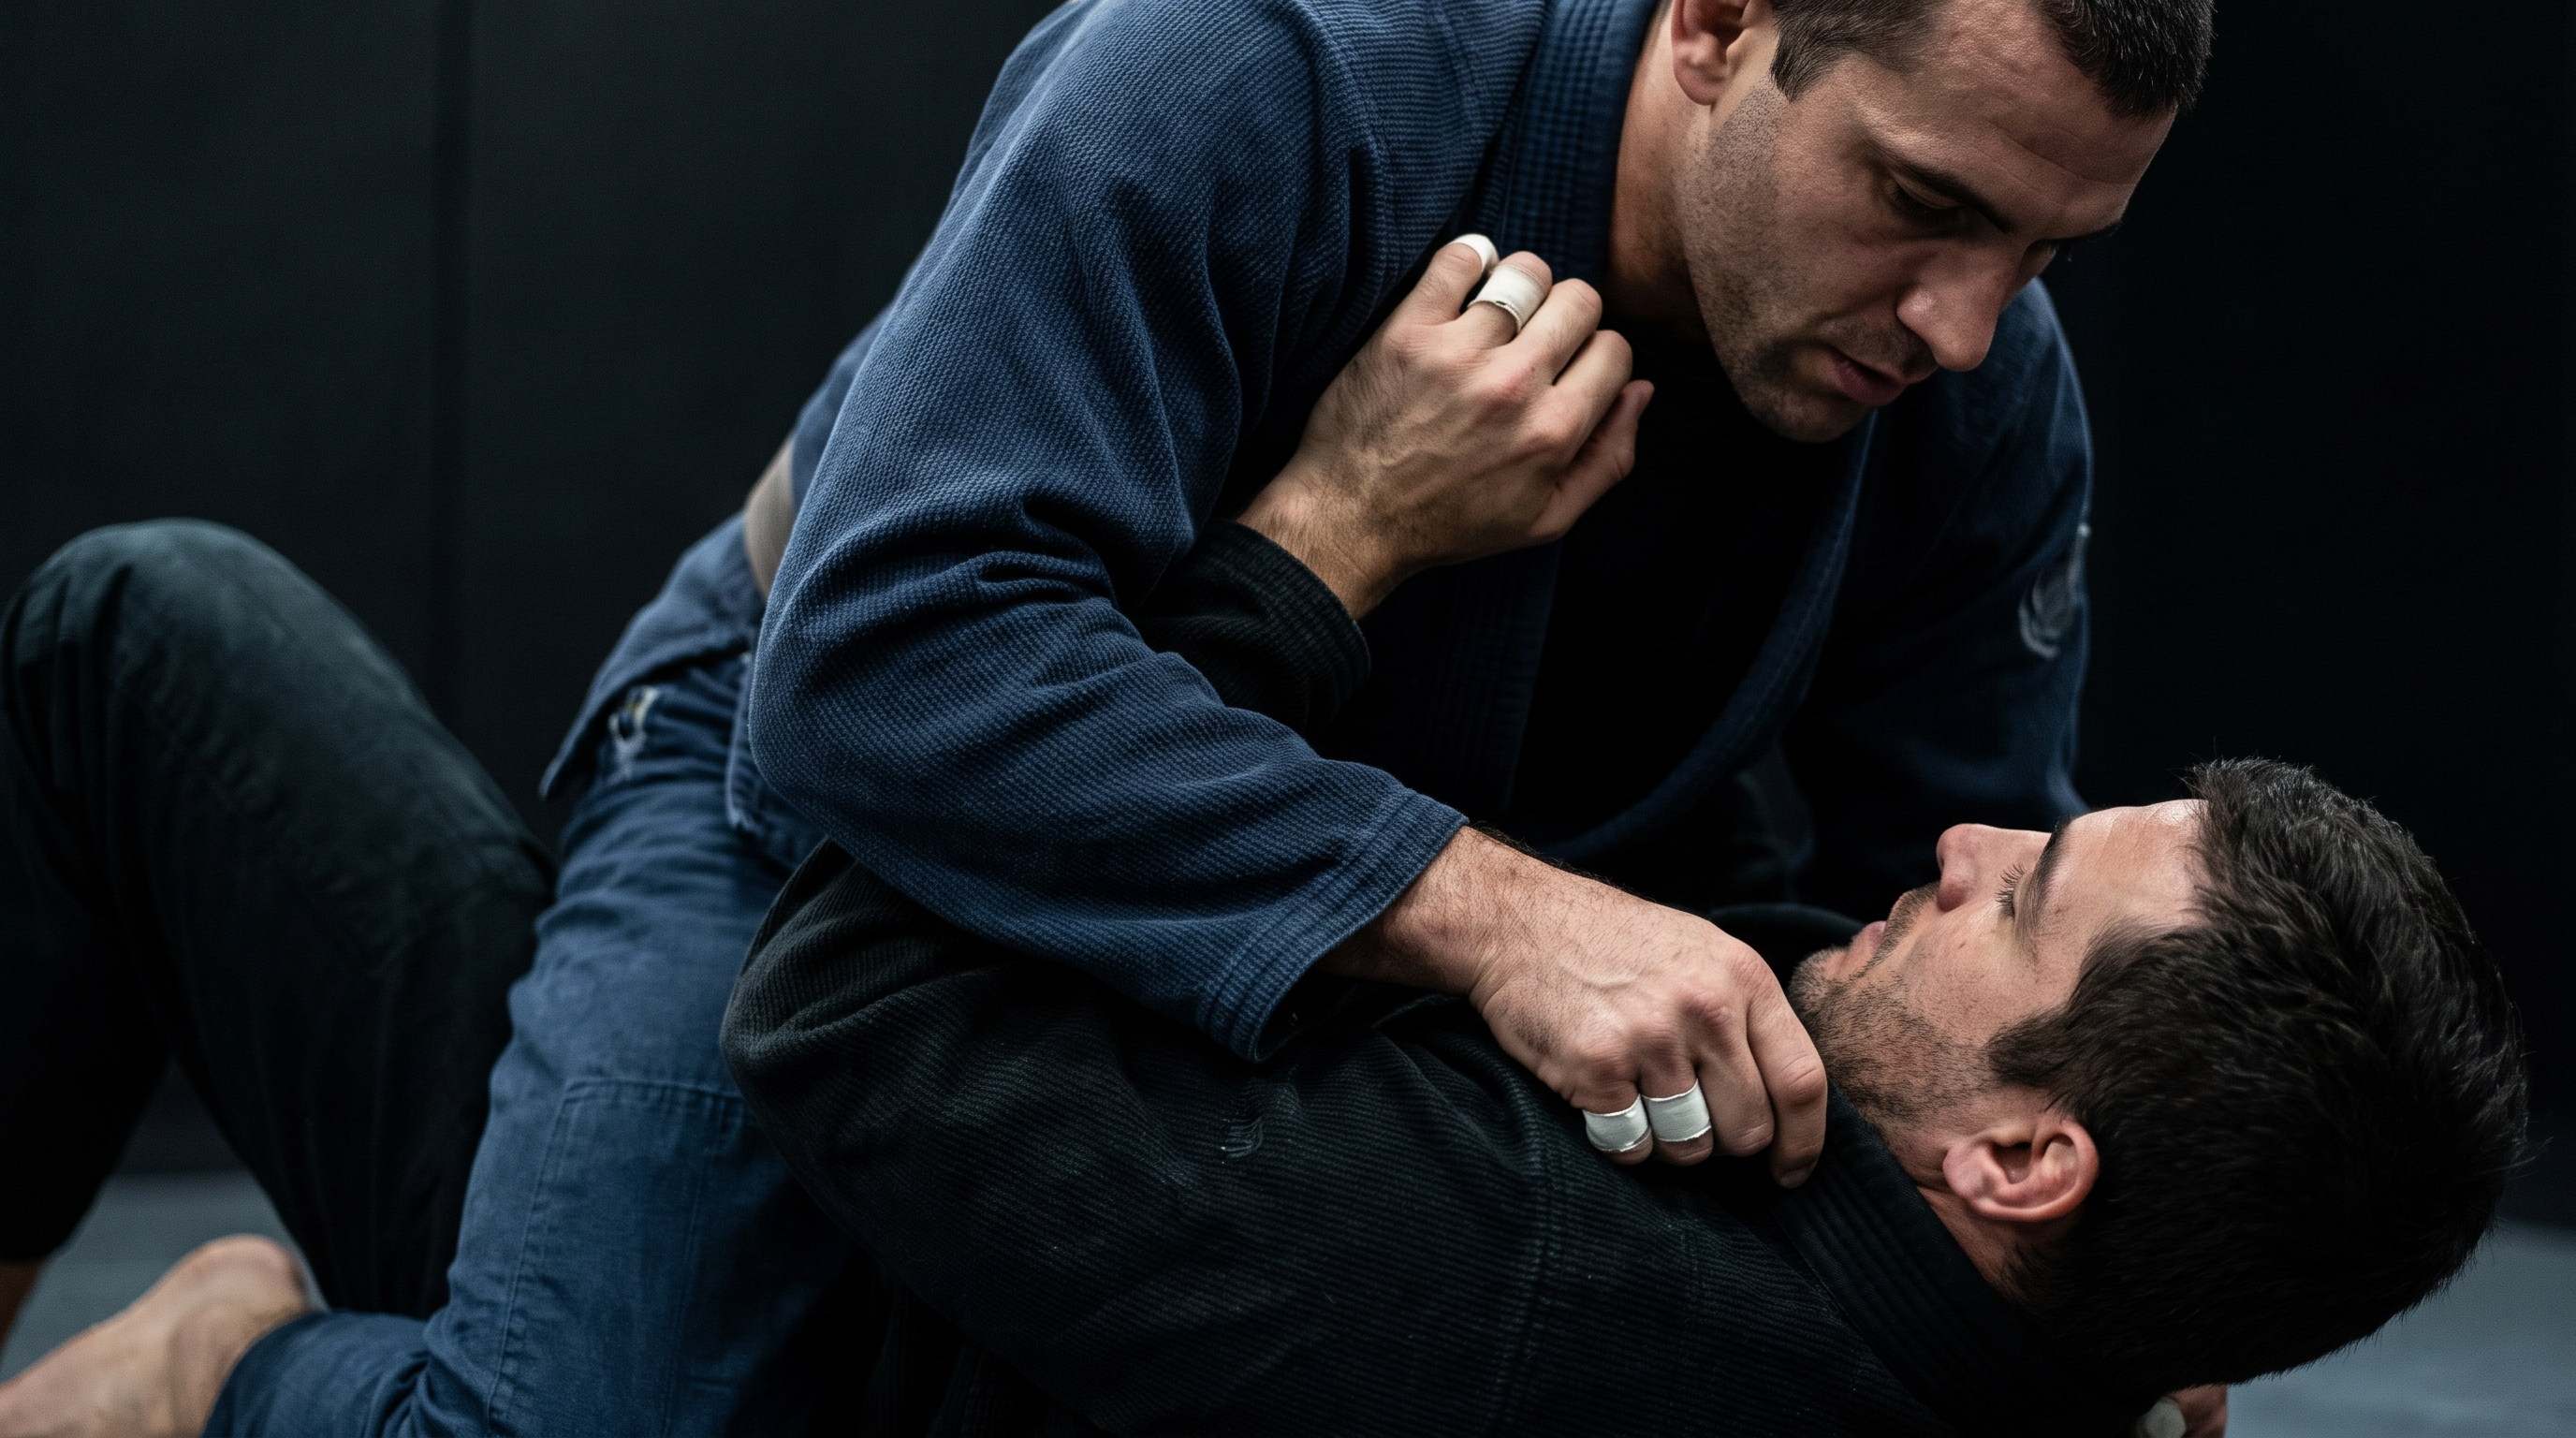
Cross Collar Choke from Mount: The Grip Sequence White Belts Keep Getting Wrong
TL;DR. The cross collar choke from mount fails for most white belts because they grip in the wrong order, sit too high, and pull instead of driving elbows to the mat. Lead with a deep first grip (thumb inside the collar, four fingers behind the neck), then thread the second hand under the first. Finish by pulling your elbows wide and low, dropping chest weight, and turning your knuckles toward the ceiling. It's a mechanical squeeze, not an arm-strength move.
The cross collar choke from mount is usually the first "real" gi submission a Brazilian Jiu-Jitsu practitioner learns. It looks simple — two hands on the collar, squeeze — and that simplicity is exactly why it goes wrong. The mechanics are unforgiving: if your grip order is off, your depth is shallow, or your elbows flare instead of collapse, your training partner just smiles up at you while you burn out your forearms.
This guide breaks the choke into the grip sequence itself, the finishing mechanics, and the specific errors coaches see week after week on the mat. It assumes you can hold mount for at least a few seconds against a resisting partner. If you can't yet, work on your mount base first — the choke won't save a bad position.
Key takeaways
- The cross collar choke from mount is a blood choke that closes the carotid arteries on both sides of the neck using the opponent's own gi collar.
- Grip order matters: the first (deep) hand sets the anchor, and the second (shallow) hand slides underneath, palm up, into the opposite collar.
- Depth beats grip strength — your first four fingers need to be behind the neck, not on the shoulder or clavicle.
- Finish by driving your elbows toward the mat and expanding your chest, not by yanking with your biceps.
- Sitting too high on the chest makes the choke weaker; keep your hips low and your base wide so you don't get bumped off.
- White belts most often fail by gripping second-hand-first, by keeping thumbs outside the collar, and by pulling straight back instead of rotating.
- Drill the grip sequence separately from the finish so the hand pattern becomes automatic before you add pressure.
Why this happens (why the choke feels "impossible" at first)
Most white belts learn the cross collar choke as a picture rather than a sequence. The instructor shows the final position — two crossed hands, deep in the collar — and asks you to replicate it. So you reach with whichever hand feels natural, grab whatever piece of gi is closest, and try to muscle the finish.
The problem is that the crossed-hand shape is the end of the technique, not a place you can grab your way into. If your bottom hand goes in first, your top hand has nowhere to thread. If your first grip is shallow, your second grip has no leverage. If you sit high on the chest to reach the collar, your opponent bridges you off before you finish.
The cross collar choke is a sequence — grip, grip, posture, finish — and each step depends on the previous one being correct. Understand the order, and the choke becomes one of the most reliable submissions in the gi. Skip a step, and it feels like the technique itself is broken.
There's also a strength illusion at play. Because you're squeezing your hands together, it feels like a bicep exercise. It isn't. A well-set cross collar choke is finished by opening your chest and dropping your elbows, using bone alignment and body weight rather than arm strength. Beginners who trust the mechanics finish it long before beginners who try to muscle it.
A simple system: the 6-step grip sequence
Here is the sequence coaches teach again and again, broken down so you can drill each layer separately.
1. Establish and hold mount first
Before you reach for a collar, own the position. Knees pinched to your partner's ribs, heels tucked toward their hips, hips low, chest heavy. If you're perched high on their chest to reach for the collar, you've already lost — they will bridge you into half guard the moment your weight shifts. A stable low mount buys you the two or three seconds you need to hunt for grips.
2. Open the collar with your non-dominant hand
Use your non-dominant hand to feed the collar. Pin their opposite lapel down near the sternum, or peel the collar back with a small tug so the fabric is loose and available. You are not gripping to choke with this hand yet — you are creating a runway for your first real grip.
3. Insert the deep hand: thumb inside, four fingers behind the neck
This is the single most important grip in the technique. With your dominant hand, reach across and insert your thumb inside the far collar. Your four fingers should slide behind their neck, not on the shoulder, not on the clavicle. Aim to plant your knuckles as far around the back of the neck as you can. If you can feel the seam of the gi against your webbing, you're at good depth.
4. Feed the second hand — palm up, under the first
Now, and only now, bring the second hand across. This hand goes palm up, sliding underneath your first arm, and grips the opposite collar (the same side as your first hand's elbow). Fingers inside the collar, thumb outside — the mirror of hand one. Your wrists should end up crossed like an X in front of your opponent's throat, first hand on top.
5. Reset your base and lower your hips
Before you finish, check your base. Your knees should still be tight to their ribs, your hips low, your head close to theirs. If you had to sit up to grip, ride your weight back down onto their chest. The finish requires you to be heavy and close, not tall and reaching.
6. Finish: elbows to the mat, chest expands, knuckles rotate up
The finish is not a pull. It's a three-part expansion:
- Drop your elbows toward the mat, on either side of their head.
- Expand your chest as if pinching your shoulder blades together.
- Rotate your knuckles up toward the ceiling so the blade of your wrist cuts into the sides of the neck.
Done correctly, the collar cinches on both carotid arteries and the tap comes fast. Done incorrectly, you'll feel your forearms burn while your partner shrugs it off.
| Step | What you're doing | Common wrong version |
|---|---|---|
| 1 | Low, based mount | Perched high on chest |
| 2 | Open the collar with the non-dominant hand | Grabbing a random handful of gi |
| 3 | Deep first grip, thumb inside, fingers behind neck | Thumb outside, fingers on shoulder |
| 4 | Second hand palm up, under the first | Second hand on top, palm down |
| 5 | Hips reset low, chest heavy | Still sitting tall, weight forward |
| 6 | Elbows drop, chest opens, knuckles rotate up | Biceps curl, elbows flare out |
Remember. The choke is finished with your torso, not your hands. If your forearms are burning before your partner taps, the mechanics are off — reset and check the grip order.
Common mistakes (and how to fix each)
Mistake 1: Gripping second-hand-first
The most common error. Beginners reach with whichever hand is closest, which is usually the non-dominant one. Then the dominant hand has no space to go deep. Fix: commit to the sequence. Deep hand always goes in first. Say it out loud in drilling if you have to.
Mistake 2: Shallow first grip
The thumb-inside grip lands on the shoulder or clavicle instead of behind the neck. From there, no amount of squeezing produces a choke — you're just pinching skin. Fix: aim for depth before you worry about grip strength. If you can only get one hand in deep, take that one and abandon the second-hand grab until you improve your entry.
Mistake 3: Thumbs outside the collar
A "safe" thumb-outside grip on both hands feels stronger to a beginner, but it puts your fist on the collar rather than the blade of your wrist. The choke is much weaker. Fix: at least one hand — the deep one — needs the thumb inside. Many coaches teach both thumbs inside for maximum wrist bite.
Mistake 4: Sitting too high on the chest
To reach the collar, white belts often crawl up their partner's chest, sometimes ending on the sternum. This raises your center of gravity, kills your base, and invites the upa (bridge) escape. Fix: stay low mount. Reach with your arms, not with your hips.
Mistake 5: Pulling straight back
Once grips are in, the instinct is to yank the hands back toward your own chest. This flares the elbows out and opens the choke instead of tightening it. Fix: think of the finish as "elbows to the mat" rather than "hands to me." You're closing your ribcage around their neck.
Mistake 6: Telegraphing the choke
Staring at the collar, freezing your hips, then lunging with two hands gives your partner all the time they need to defend. Fix: control posture first, keep your weight active, and set the deep grip almost as an afterthought — like you're just adjusting your position — before committing to the finish.
Mistake 7: No follow-up when the choke defends
Good defenders will tuck their chin and try to peel your grips. If you have no plan B, the position stalls. Fix: know that the cross collar choke chains cleanly into the armbar from mount, the ezekiel, and the s-mount. The threat of the choke is often more valuable than the choke itself.
Remember. In gi jiu-jitsu, the tap often comes from a series of threats, not a single grip. If the choke stalls, ride the reaction into the next attack.
Where BJJ Memo fits in
The cross collar choke has maybe a dozen small details — grip depth, thumb orientation, elbow path, hip position — and it's very easy to remember three of them and quietly forget the rest by your next class. That's the retention gap BJJ Memo was built to close.
Paste the URL of any BJJ YouTube video breaking down the cross collar choke and the app produces a structured Technique Card with the steps, key details, and tappable timestamps for the visual moments that matter. The card sits in your personal library, and the review flow surfaces it before your next session so the details are fresh when you step on the mat. It's a helper for revision — not a replacement for drilling on the mat or getting corrections from a coach.
Frequently asked questions
Is the cross collar choke from mount a blood choke or an air choke?
It's a blood choke. When set correctly, the blades of your wrists compress the carotid arteries on both sides of the neck, restricting blood flow to the brain. It should not crush the windpipe — if your partner is coughing and gasping rather than tapping quickly, your grips are on the throat instead of the sides of the neck, and you need to reposition.
Which hand should go in first, dominant or non-dominant?
The deep hand goes in first, and most people find their dominant hand goes deeper more reliably. So dominant hand deep, non-dominant hand shallow (underneath), for most practitioners. What matters more than which hand is that you commit to the order and don't second-hand-first.
Can I use the cross collar choke in no-gi?
No. This choke depends on the friction and structure of the gi collar. In no-gi, the analogous submissions from mount are things like the arm-triangle, the ezekiel (with the sleeve of your rashguard), and various head-and-arm chokes. The grip sequence taught here is specific to gi jiu-jitsu.
Why do I gas out my forearms before my partner taps?
Because you're finishing with your hands instead of your torso. A correctly set cross collar choke is finished by dropping your elbows toward the mat and expanding your chest — bone alignment, not muscle. If your forearms are the bottleneck, reset the grips deeper, check that your thumbs are inside, and finish by opening your chest rather than squeezing.
How do I stop my partner from bridging me off before I finish?
Stay low. If your knees are pinched to their ribs, your hips are heavy, and your head is close to theirs, the upa is much harder to land. The moment you sit up tall to reach for grips, you give them the leverage to bridge. Reach with long arms and a low base, not by climbing up their chest.
How long does it take a white belt to make this choke work in live rolling?
Honestly, it varies. Some people land it in their first month; others take longer because their mount control isn't there yet. The fastest way to shorten that timeline is to drill the grip sequence hundreds of times on a compliant partner until it's automatic, and separately work on holding mount against resistance. When the two skills meet, the choke starts appearing on its own.
Wrap-up: drill the sequence, finish with your torso
The cross collar choke from mount rewards patience. Own the position, feed the deep hand first, thread the second hand underneath, then finish by dropping elbows and opening the chest. It is one of the highest-percentage gi submissions available to a white belt — but only if the sequence is respected.
For real feedback and safety, train the choke at a legit academy with a qualified coach — this article is a study aid, not a substitute for mat time and corrections from someone watching you drill. Next time you watch an instructional on the cross collar choke, save it as a Technique Card in BJJ Memo so the grip order, hand orientation, and finishing mechanics are there when you need them, right before you tie your belt. Build your own technique library and revise before training.
Last updated 2026-09-23.